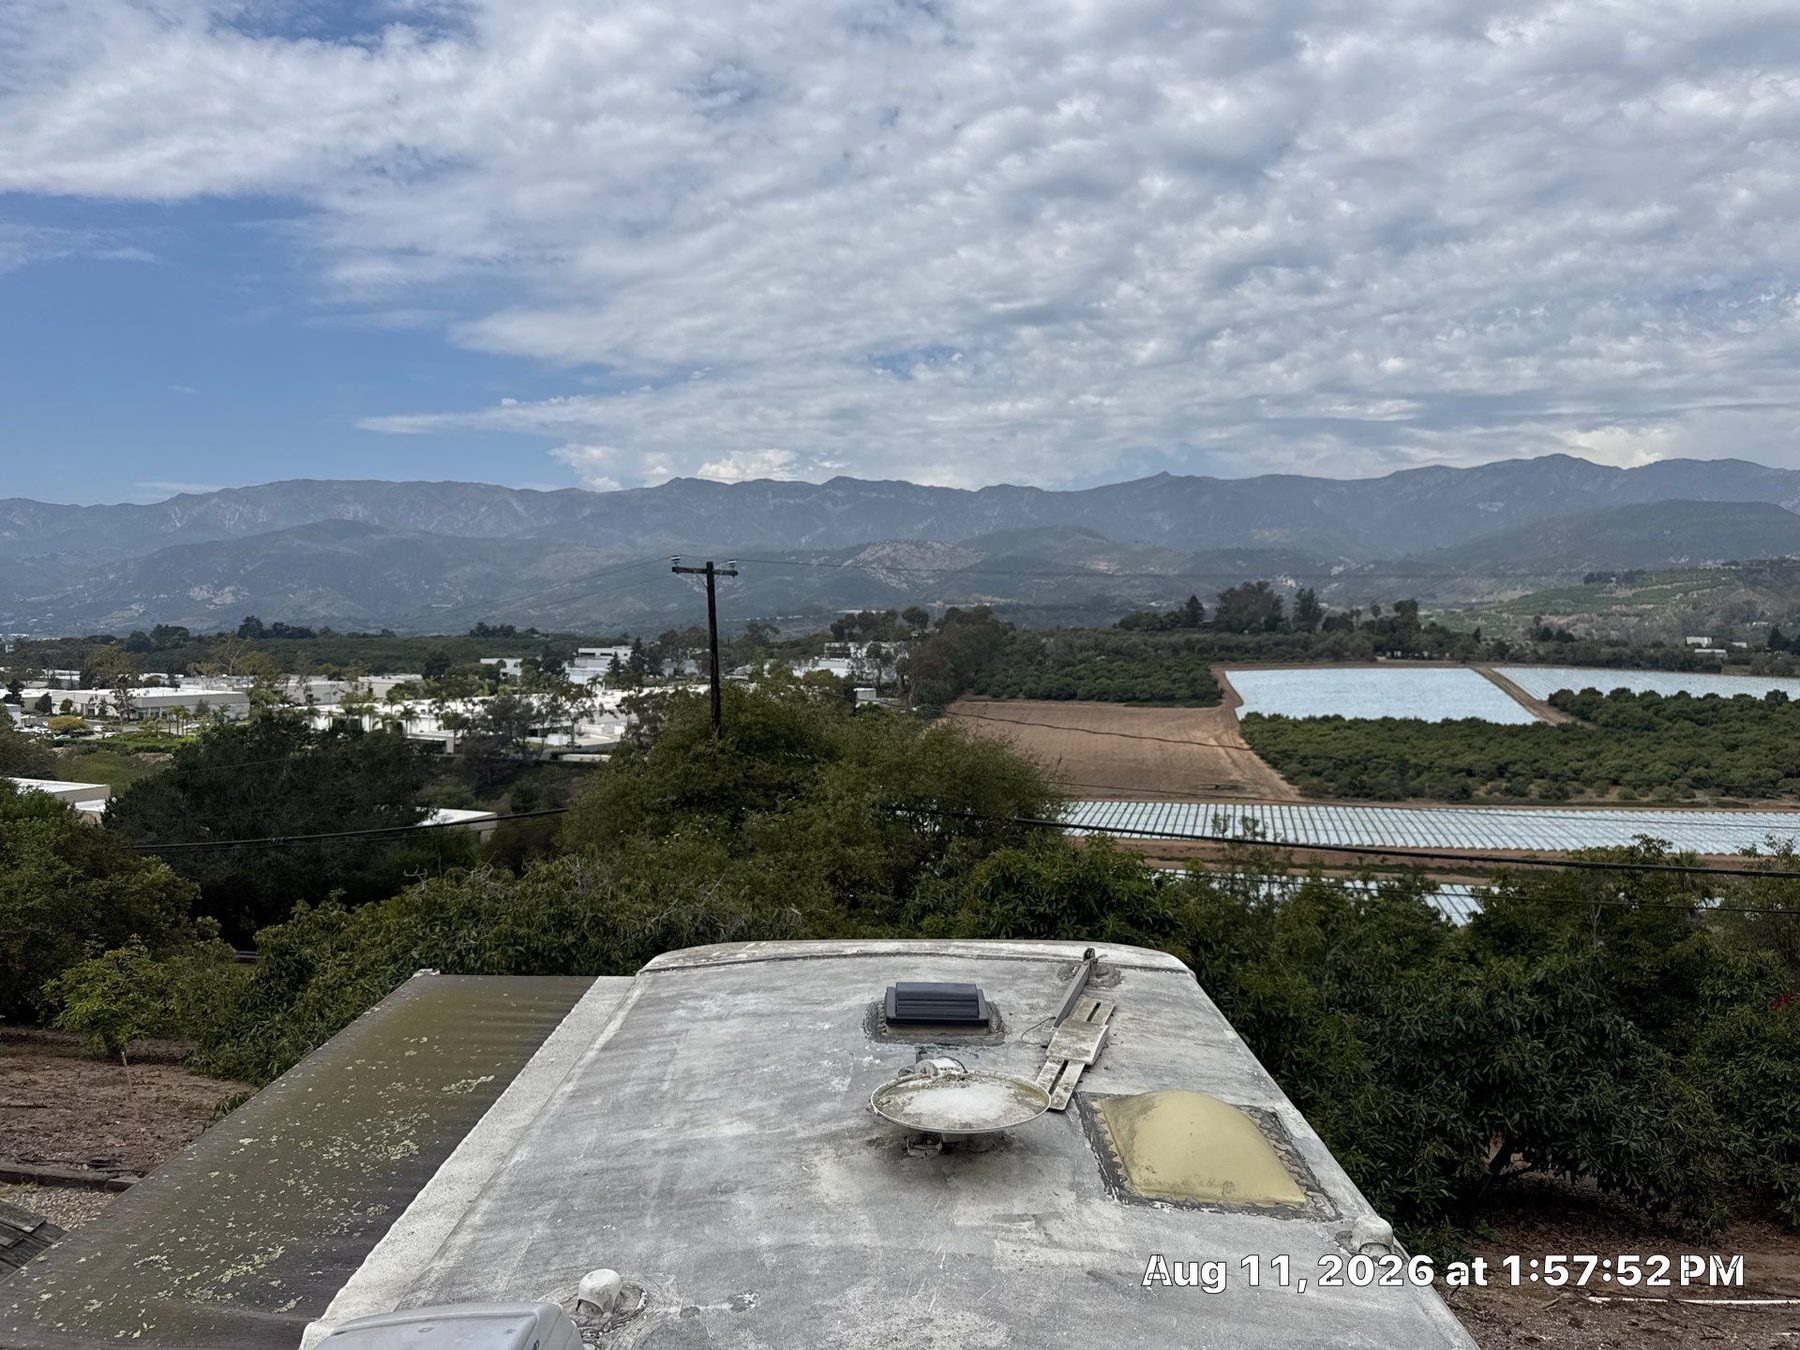
A real one from a recent job — a 20-plus-year-old RV roof here in the county, oxidized and chalky after years without maintenance. This is what a neglected roof looks like heading into a wet winter.
Quick answer
To keep your RV roof from leaking, inspect the lap sealant around every vent, skylight, and seam at least twice a year and before the rainy season. Clean the membrane with a mild, roof-safe cleaner, then reseal any cracked or aged seals with a self-leveling lap sealant matched to your roof type (EPDM or TPO). Never use household silicone or spray-on products, and call a pro for soft, spongy decking or a full reseal.
Forecasters are calling for a strong El Niño this fall, with near-record rainfall possible along the Santa Barbara coast. For your RV, the roof is the one system where a small, ignored problem quietly turns into an expensive one. Water doesn't announce itself — it seeps through a hairline crack in a seal, works into the wood decking, and by the time you see a stain on the ceiling inside, you're often looking at rotted decking and delamination instead of a tube of sealant.
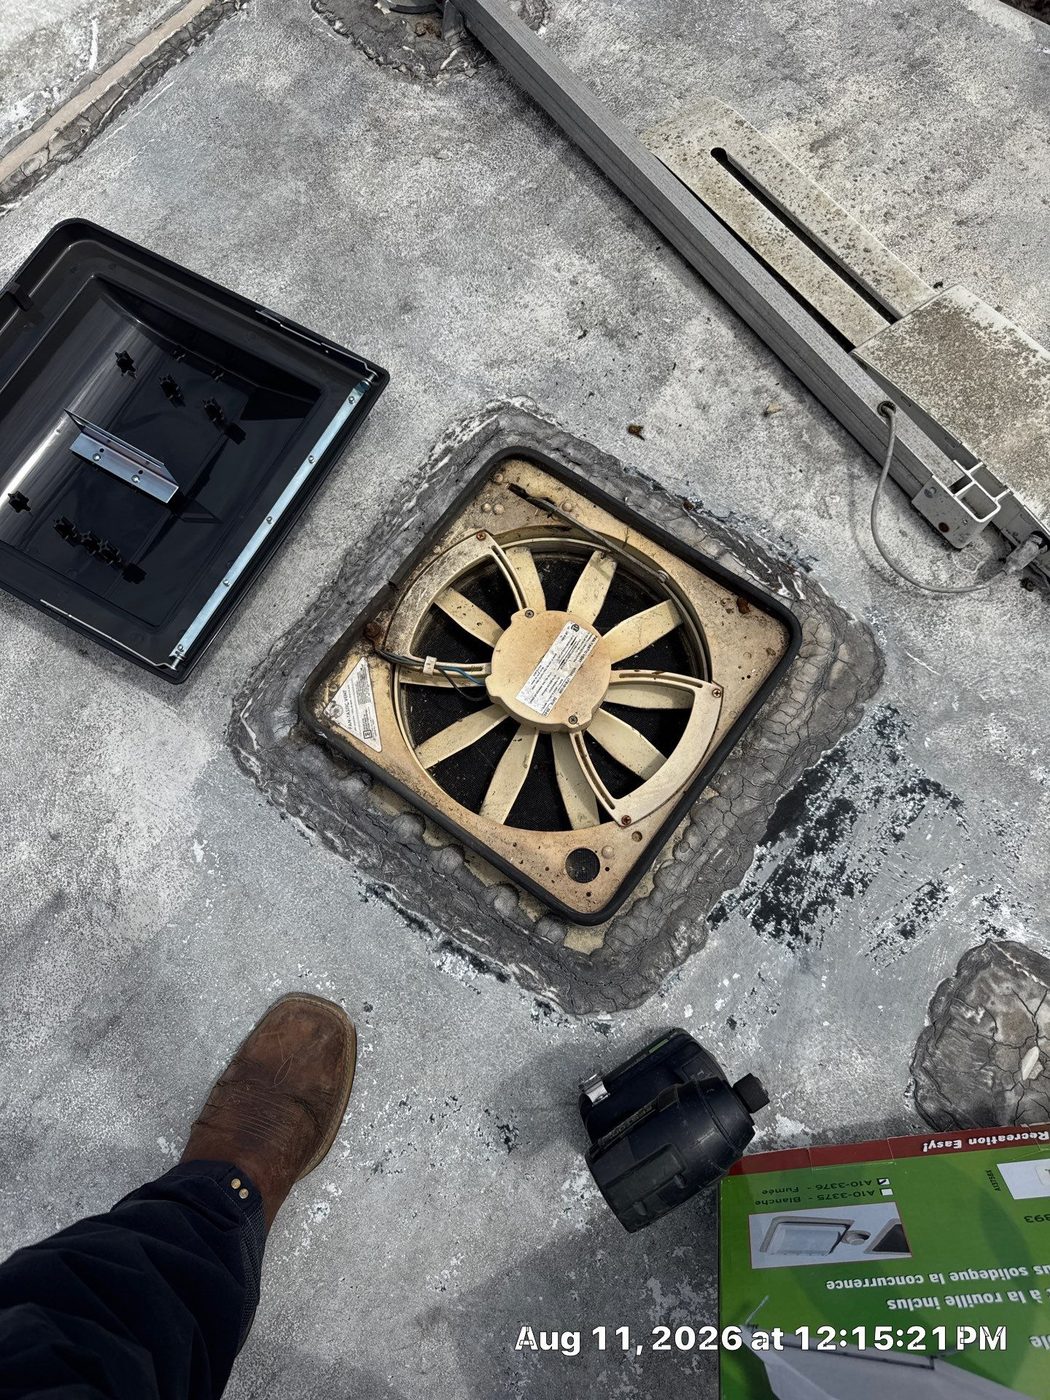
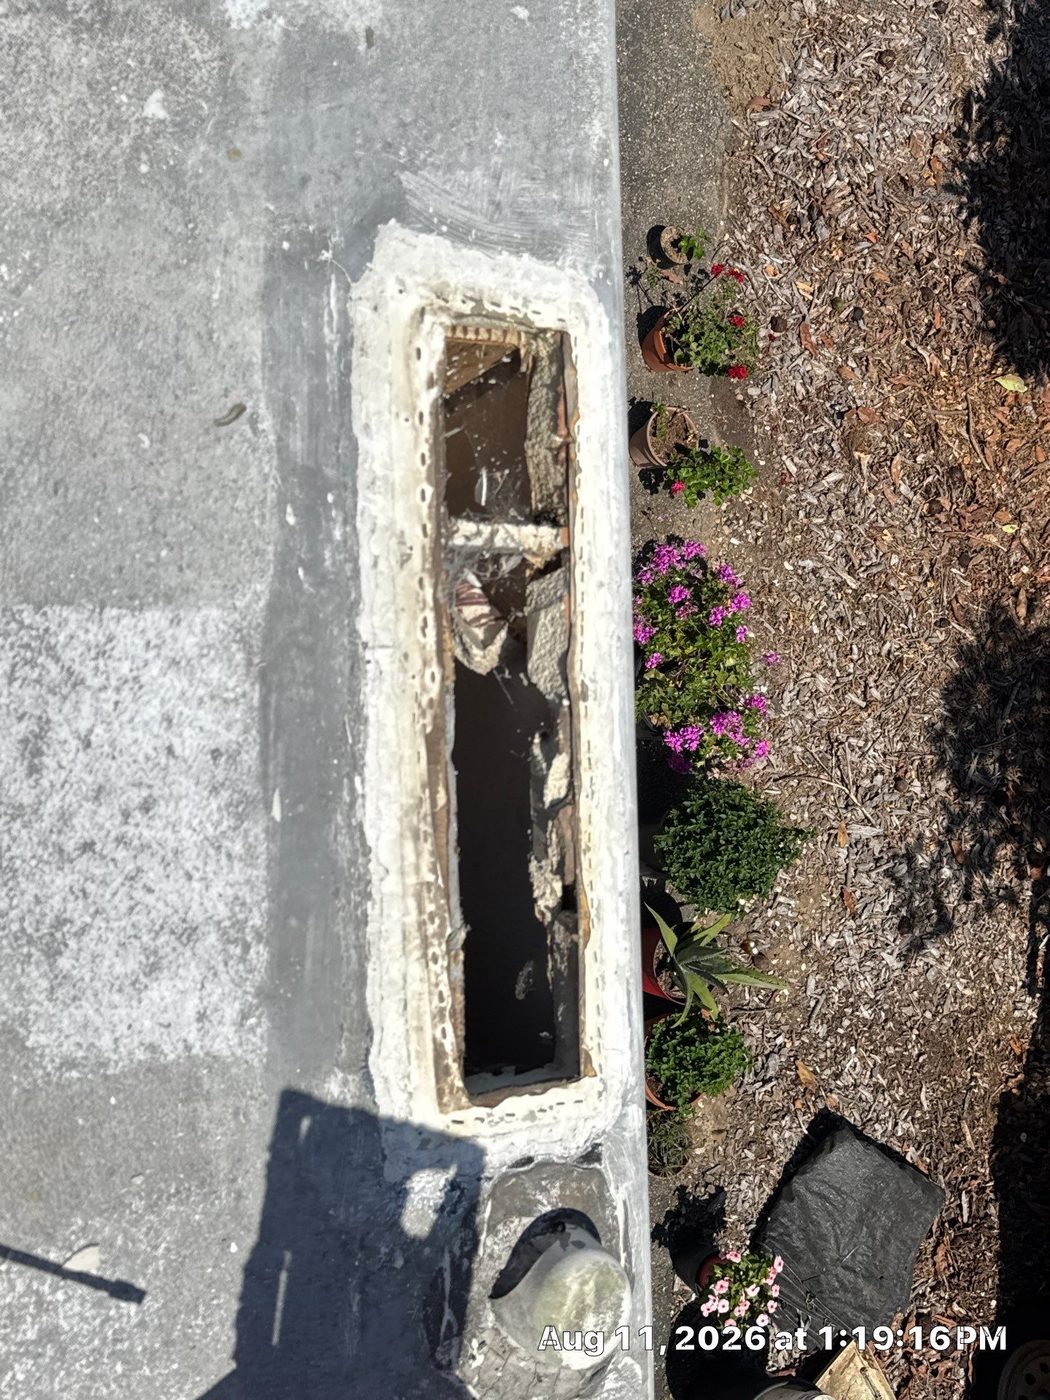
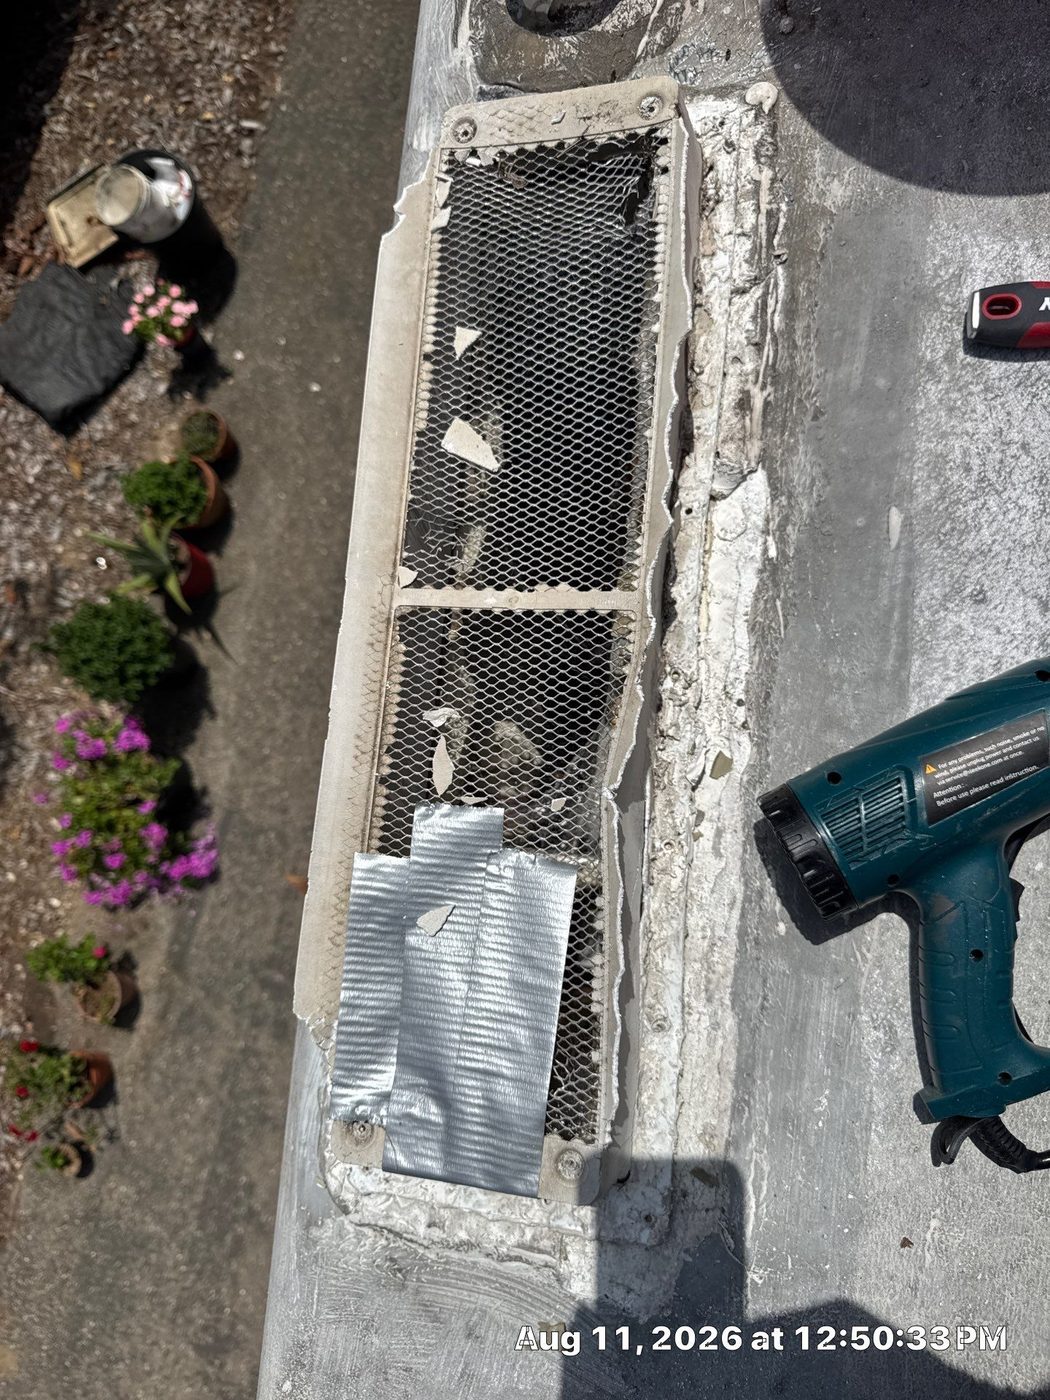
The good news: catching it is straightforward, and much of this is within reach for a hands-on owner. The photos here came off that same rig — cracked, crumbling sealant, a duct-tape "repair," and soft, water-rotted decking hiding under a vent. That roof went years without a look. Yours doesn't have to. Here's how to check it before the first big storm.
1. Get up there safely — and know what you're standing on
First rule: not every RV roof is rated to walk on, and a soft or aging roof can be slick. Use a stable ladder, work only on a dry roof, keep your weight near the strong center line, and stay off the edges — and if you're not steady at height, this is a fine place to stop and let us handle it. While you're up there, identify your membrane. Most RV roofs are a rubber membrane — EPDM (it weathers to a chalky gray and shows a black base layer where it's worn, exactly like the roof above) or TPO (a single white layer); a few are fiberglass or aluminum. Which one you have decides what cleaner and what sealant are safe to use.
2. Inspect every seal and seam — that's where most leaks start
Water almost never comes through the open middle of the roof; it comes in around the things poking through it. Walk the whole perimeter and every penetration: vents, the A/C shroud, skylights, the antenna base, the refrigerator and plumbing vents, and the front and rear seams. Look closely at the lap sealant — the bead of white or black sealant around each fixture — for cracks, gaps, peeling, missing chunks, or exposed screw heads. Cracked, crusty sealant like this is a standing invitation to rainwater.
3. Check the membrane itself
Scan the flat field for tears, punctures, or bubbles. On EPDM, look for worn spots where the black base shows through and for heavy chalking. Then gently feel for soft or spongy spots underfoot — a springy area means water has already gotten in and the decking below may be rotting. Don't dig into it; just note where it is and flag it for a technician. This is what's waiting under a vent that leaked for years:
4. Clean it — gently
Sweep off leaves and debris, then wash with a mild, roof-safe cleaner, a soft or medium brush, and water. On a rubber roof, skip anything petroleum- or citrus-based, harsh solvents, abrasive pads, and pressure washers — they can damage the membrane and blast open your seams. Fresh sealant won't bond over dirt and chalk, so rinse well and let the roof dry completely before you seal anything.
5. Reseal — clean and top-coat, or scrape and redo
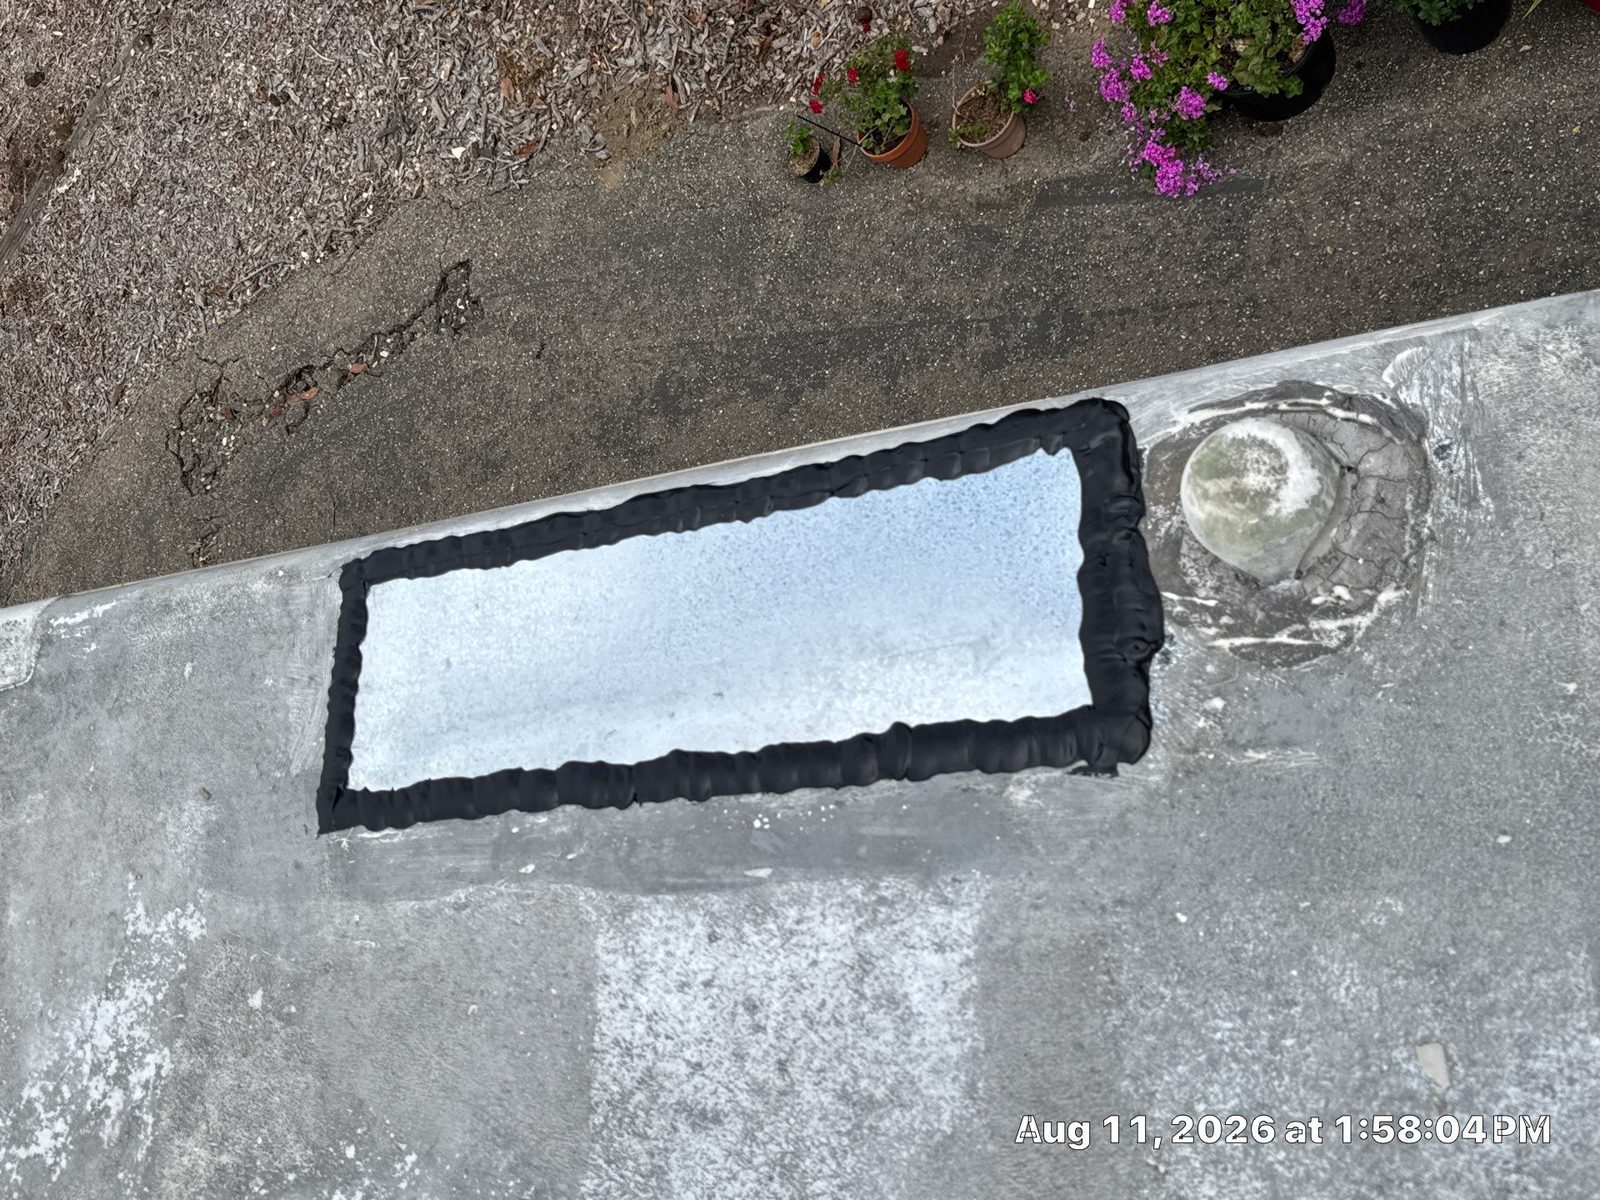
Here's the part people overthink: you usually do not need to strip off all the old lap sealant. If the existing sealant is still sound and simply aged, clean it, let it dry, and lay a fresh bead of compatible self-leveling lap sealant right over the top on the horizontal seams (use the non-sag type on vertical surfaces). Only where the sealant is cracked, lifting, or crumbling should you scrape off the loose material first, then clean and re-seal. Two musts: match the sealant to your membrane type — there are EPDM and TPO versions, and the wrong one won't bond — and never substitute hardware-store silicone, spray-on products, or household caulk.
6. Put it on a schedule
Check your seals at least twice a year, and always before the rainy season, after a branch scrapes the roof, or when you buy a used rig. A $10 tube of sealant on a dry afternoon is the cheapest insurance you'll ever buy against a rotted roof. Sealing the roof is part of our roof and exterior services, and it's one of the smartest pre-winter jobs an RV owner can stay ahead of.
One safety rule that never bends
An RV roof puts you at height on a surface that may not be rated to walk on, and an old membrane can be slippery. Work only on a dry roof, stay away from the edges, and if anything about the climb or the roof's condition feels unsafe, stop and call a pro. There's no repair worth a fall.
When it's time to call a pro
Reach out if you find soft, spongy, or springy spots (that's water-damaged decking, and it's structural); the sealant has failed over large areas or the whole roof is due for a full reseal; you see tears, punctures, seam separation, or widespread blistering; you're not sure what membrane you have or which sealant is compatible; the fix means resealing around the A/C or a skylight that has to be removed and re-set; or you find a past "repair" like the duct tape below. Those all need to be redone correctly before the rain finds them.
RV roof maintenance FAQ
How often should I inspect and reseal my RV roof?
Inspect the roof and all of its seals at least twice a year, and always before the rainy season. Reseal the lap sealant as it ages, cracks, or pulls away — you don't have to reseal a sound roof, but never let cracked sealant go into a wet winter.
Do I have to remove all the old lap sealant before resealing?
Usually not. If the existing sealant is still sound and just aged, clean it, let it dry, and apply a fresh bead of compatible self-leveling lap sealant right over the top. Only scrape off sealant that is cracked, lifting, or crumbling, then clean and re-seal that spot.
What sealant should I use on an RV roof — and can I use Flex Seal or silicone?
Use a self-leveling lap sealant made for your membrane type — there are EPDM and TPO versions, and the wrong one won't bond. Use the non-sag type on vertical surfaces. Don't use household silicone, hardware-store caulk, or spray products like Flex Seal on an RV roof; they won't flex or adhere correctly and can make a proper repair harder later.
How do I know if my RV roof is EPDM or TPO?
EPDM is a rubber membrane that weathers to a chalky gray and shows a black base layer where it's worn. TPO is a single white layer. A few RVs have fiberglass or aluminum roofs. If you're not sure, we can identify it on a free phone consultation.
What are the signs my RV roof is leaking?
Common signs are water stains on the ceiling or walls, a soft or spongy spot on the roof or floor, a musty smell inside, bubbling or delaminating walls, and cracked or missing lap sealant around roof fixtures. Any soft spot means water has already reached the decking and should be checked right away.
Can I pressure wash my RV roof?
No. A pressure washer can damage the membrane and force water into the seams. On a rubber roof, also avoid petroleum- and citrus-based cleaners and harsh solvents. Use a mild, roof-safe cleaner with a soft brush and water, then rinse.
Do you repair RV roof leaks in Santa Barbara and Ventura Counties?
Yes. Lavender Mobile RV Solutions is a fully mobile, Master Certified RV repair service covering Santa Barbara and Ventura Counties — from Lompoc to Ventura, including Santa Barbara, Goleta, Montecito, Carpinteria, the Santa Ynez Valley (Solvang, Buellton), Ojai, and Oak View. We come to your driveway, storage lot, or campsite. Every job starts with a free phone consultation.
Want trained eyes on your roof before the rain?
Lavender Mobile RV Solutions is a Master Certified mobile RV repair service covering Santa Barbara and Ventura Counties — Santa Barbara, Goleta, Montecito, Carpinteria, the Santa Ynez Valley, Ojai, and beyond. We come to you. Start with a free phone consultation and we'll help you figure out whether it's a quick reseal or a bigger repair.
Get a Free Estimate Call 833-RVTECH-4